
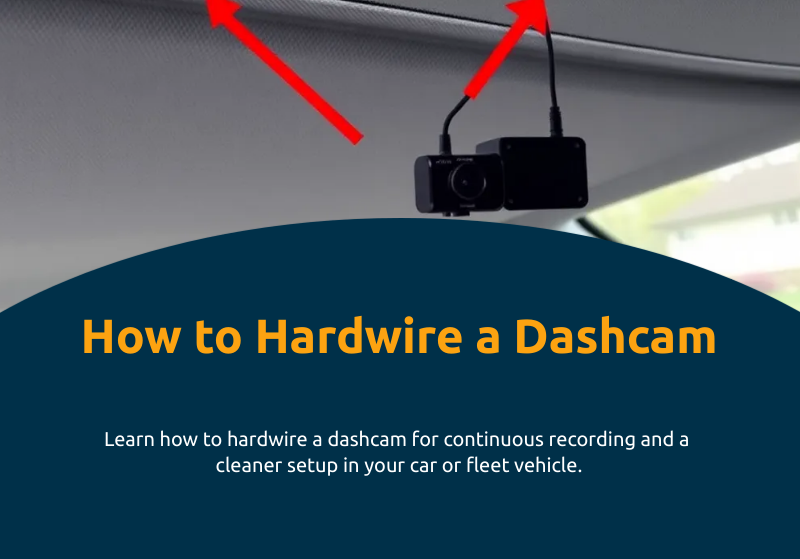
Dashcams are powerful tools for both personal drivers and commercial fleets. While many operate using the vehicle’s 12V socket (cigarette lighter), serious users often prefer hardwiring their dashcams. Hardwiring connects the device directly to the fuse box, ensuring a cleaner installation, uninterrupted recording, and access to advanced features like parking mode.
If you’ve ever asked yourself, “How do I hardwire a dashcam?” — this guide walks you through the process step by step. We’ll cover tools, safety precautions, installation methods, and the strategic benefits for both individual drivers and fleet operators.
Why Hardwire a Dashcam?
Before diving into installation, it’s worth understanding the benefits of hardwiring:
-
24/7 Recording: Enables parking mode to record even when the car is off.
-
Cleaner Setup: No dangling wires from the 12V outlet.
-
Freed Accessory Socket: Leaves your 12V port open for charging other devices.
-
Battery Protection: Many hardwire kits include voltage cut-off features.
-
Professional Look: Particularly important for fleet vehicles or business-owned cars.
For executives managing fleets, hardwiring is not just about convenience — it’s about reducing liability, ensuring continuous coverage, and creating a professional installation standard across all vehicles.
Tools and Materials Needed
Basic Tools
-
Hardwire kit (specific to your dashcam model)
-
Trim removal tool (plastic pry tool to avoid damaging panels)
-
Add-a-fuse kit (to tap into existing circuits safely)
-
Fuse puller or needle-nose pliers
-
Electrical tape or zip ties
-
Multimeter (optional but helpful for checking live circuits)
Safety Materials
-
Gloves to protect hands from sharp trim edges
-
Owner’s manual (to identify fuse locations and ratings)
Tip: Many dashcam manufacturers sell their own hardwire kits. Always verify compatibility before purchasing.
Step-by-Step Guide: How to Hardwire a Dashcam
Step 1: Choose the Right Power Source
Dashcams usually require two types of connections:
-
ACC/Switched Power: Turns on when the ignition is running.
-
Constant Power: Keeps the dashcam active when the car is off (for parking mode).
-
Ground Wire: Completes the electrical circuit.
Your fuse box contains both types of circuits, so you’ll need to identify which fuses provide constant vs. switched power.
Step 2: Locate the Fuse Box
Most vehicles have at least two fuse boxes — one inside the cabin and another in the engine bay. For dashcam installations, the interior cabin fuse box (usually under the dashboard or near the glove compartment) is the easiest to access.
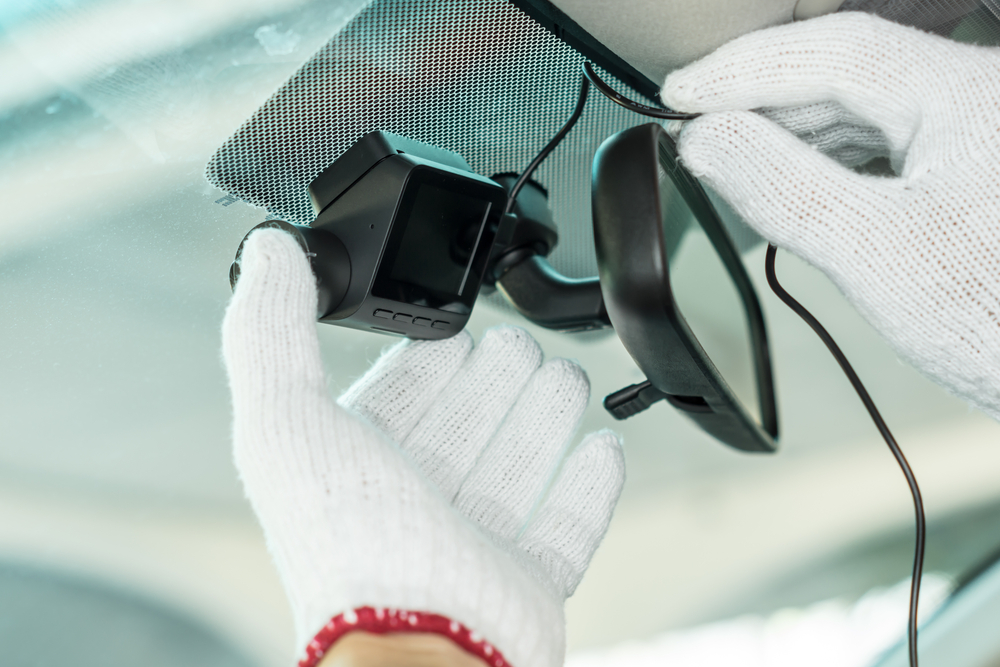
Step 3: Plan Wire Routing
Use the trim removal tool to gently tuck the dashcam cable behind the headliner, down the A-pillar, and toward the fuse box. This ensures a clean, hidden installation.
Pro Tip: Avoid running wires across airbags (often located in the A-pillar). Route wires around or behind them to prevent interference.
Step 4: Connect to the Fuse Box
-
Use an add-a-fuse kit to safely connect your hardwire cable to the fuse box without damaging the original circuit.
-
Insert the hardwire kit’s red wire into a fuse slot with switched power.
-
Insert the yellow wire into a fuse slot with constant power (for parking mode).
-
Secure the black ground wire to a metal bolt or grounding point in the vehicle chassis.
Step 5: Secure the Wiring
-
Use zip ties to bundle excess wire neatly.
-
Reattach trim panels carefully, ensuring wires aren’t pinched.
-
Test that everything powers on correctly.
Step 6: Configure Parking Mode Settings
If your dashcam supports parking mode, use the companion app or device menu to set:
-
Motion detection sensitivity
-
Impact sensitivity
-
Voltage cut-off level (to prevent draining the car battery)
Safety Considerations
Hardwiring involves working with your vehicle’s electrical system. To avoid issues:
-
Use the correct fuse rating: Never exceed the fuse’s amperage.
-
Double-check grounding: A poor ground connection will cause unstable operation.
-
Don’t skip the voltage cut-off: Prevents accidental battery drain.
-
Consider professional installation: Especially for fleets or luxury vehicles.
Hardwiring Dashcams for Fleets: Strategic Benefits
For businesses managing fleets, professional hardwiring offers advantages beyond just cleaner installations:
-
Consistency: Standardized setup across all vehicles.
-
Reliability: Reduces driver error — no forgetting to plug/unplug devices.
-
Insurance Savings: Some insurers require hardwired dashcams for fleet policy discounts.
-
Operational Efficiency: Always-on recording means fewer gaps in evidence for claims.
Fleet managers often opt for bulk professional installations, reducing downtime and ensuring uniform compliance across the fleet.
Common Mistakes to Avoid
-
Using the wrong fuse slot: Can cause malfunctions or drain power from essential systems.
-
Skipping the ground wire: Results in dashcam failing to power on.
-
Over-tightening trim panels: May crack plastic or interfere with airbags.
-
Not testing before reassembly: Always confirm functionality before closing up.

Advanced Considerations When Hardwiring a Dashcam
Hardwiring a dashcam is not just about plugging into the right fuse slot. To get the most value out of your installation, it’s important to think strategically about camera placement, vehicle type, and long-term performance.
Choosing the Best Fuse Slots
While any fuse with the appropriate power type can technically work, certain circuits are better suited than others.
-
Switched Power Candidates: Radio, ignition coil, or windshield wipers.
-
Constant Power Candidates: Dome light, hazard lights, or memory circuits.
-
Avoid: Safety-critical systems such as airbags or ABS modules — tapping into these can compromise safety and void warranties.
Tailoring to Vehicle Type
-
Passenger Vehicles: Interior fuse box access is generally simple, making DIY feasible.
-
Commercial Vans & Trucks: May require additional routing time due to larger cabins and more complex fuse layouts.
-
Luxury Vehicles: Sensitive electrical systems mean professional installation is strongly recommended.
Key insight: The complexity of your vehicle should influence whether you attempt DIY or hire a professional.
Long-Term Maintenance for Hardwired Dashcams
Once your dashcam is hardwired, it’s not a “set it and forget it” solution. Proper maintenance ensures reliability.
Memory Card Health
-
Use high-endurance microSD cards designed for constant recording.
-
Replace cards every 1–2 years to avoid corrupted files.
Periodic Wiring Checks
-
Every few months, inspect fuse connections and ground points to ensure they remain tight.
-
Look for frayed or pinched wires under trim panels.
Firmware Updates
-
Many dashcams release updates to improve parking mode detection, reduce false triggers, or expand features.
-
Schedule quarterly checks for firmware updates via manufacturer websites or mobile apps.
Cleaning & Lens Maintenance
-
Keep the lens free of dust or smudges.
-
Use microfiber cloths and avoid harsh chemicals.

Troubleshooting Hardwired Dashcam Issues
Even with proper installation, issues can occur. Here’s how to identify and fix common problems:
Dashcam Won’t Power On
-
Check Ground Wire: A poor ground connection is often the culprit.
-
Verify Fuse Slot: Ensure the add-a-fuse is in a live circuit.
-
Test with Multimeter: Confirm the chosen fuse is delivering the expected power.
Parking Mode Doesn’t Engage
-
Verify that the dashcam is connected to both constant and switched power sources.
-
Double-check voltage cut-off settings.
-
Ensure the parking mode feature is enabled in the device settings.
Battery Drain Concerns
-
Lower motion/impact sensitivity to reduce unnecessary recording.
-
Enable automatic cut-off at 12.0V–12.2V for standard car batteries.
-
Consider adding an external battery pack if extended coverage is needed.
Poor Video Quality at Night
-
Adjust settings for exposure and sensitivity.
-
Upgrade to a dashcam with low-light or infrared capabilities.
Trends in Dashcam Hardwiring
Hardwiring today is often a manual process, but the market is evolving.
-
Smart Vehicle Integration: As cars become more connected, manufacturers may offer built-in accessory power taps specifically for dashcams.
-
Wireless Power Delivery: Early-stage prototypes are exploring inductive power transfer to reduce wiring altogether.
-
Telematics Integration: Hardwired dashcams paired with fleet management systems will soon allow for automated reporting, AI-based incident detection, and predictive maintenance.
Decision-makers should view hardwiring as a step toward broader vehicle telematics adoption.
Extended FAQ (Fleet & Advanced Questions)
Q: Can multiple dashcams (front and rear) be hardwired to one kit?
A: Yes, many kits support dual-channel systems. However, ensure the fuse slot you select can handle the combined draw.
Q: What’s the difference between hardwiring and using an external dashcam battery?
A: Hardwiring draws from the car’s battery (with safeguards), while external packs isolate the power source. For long-term parking surveillance, a battery pack can be more reliable.
Q: How do I know if I’ve chosen the correct fuse slot?
A: Use a multimeter: switched fuses show voltage only when ignition is on, while constant fuses always show voltage.
Q: Can I hardwire a dashcam in an electric vehicle (EV)?
A: Yes. The process is similar, but you must be cautious about tapping into high-voltage circuits. Always consult an EV-certified installer.
Q: Should every company fleet vehicle be hardwired, or only high-risk ones?
A: Ideally, all should be hardwired for consistency. However, companies often prioritize high-value or high-risk vehicles first, then expand over time.
Q: What happens if a hardwired dashcam malfunctions?
A: Most failures are either due to faulty microSD cards or wiring issues. Swapping the card or checking fuse connections usually resolves the issue.
Q: Can hardwired dashcams be integrated with GPS tracking?
A: Yes. Many modern dashcams include GPS modules that sync with telematics platforms, offering route tracking, speed logs, and location-based incident detection.